







You own more outfits than you think. Most women I work with are standing in front of a wardrobe that already holds dozens of looks they’ve never worn, simply because each piece has only ever been worn with the same one or two partners. The most effective of all the layering hacks for style isn’t a shopping trip. It’s a formula, and it costs nothing.
Here’s my view, plainly: a “nothing to wear” morning is almost never a clothes shortage (though I have occasionally seen a dire wardrobe where there was almost nothing inside, as everything was worn out and little was salvageable, but that’s much less common). It’s a combination shortage. A top that only ever goes with one pair of trousers isn’t really part of a wardrobe; it’s a uniform. Put a different layer over it, a new texture beside it and a fresh focal point accessory near your face, and that one top becomes four outfits.
Why layering multiplies your wardrobe
Think of your wardrobe as a pantry rather than a set of ready meals. A pile of ingredients isn’t dinner. A method is what turns the same flour, eggs and butter into pancakes on Monday and a cake on Saturday. Layering is that method.

Now do the maths. Say you have four base outfits, three structure pieces, three textured layers and four focal points. Multiply them together, and you get 144 possible combinations. Not every one will work (some will clash, some will be far too warm for the day), but even if only a third make the cut, that’s nearly 50 outfits. No new purchases required.
If you’ve read my post on the rule of three, you’ll know I believe a top and a bottom are just clothes until a third piece turns them into an outfit. This formula takes that third piece and splits it into its working parts, so you can swap each one on its own and get a brand new look every time.
The layering hacks for style formula: base, structure, texture, focal point
1. The base
Your base is the quiet foundation: a plain tee, a fine knit, a simple shirt and trousers, a slip dress or a jersey dress. Its job is to stay in the background and play nicely with everything else. The more plain bases you have in colours that suit your value and intensity, the more combinations the rest of the formula can unlock.
My most underrated base, and I’ll defend this one to anyone, is a fine-gauge long-sleeve top in a neutral or receding colour (softer blues or greens) that suits you and works with your palette. It slides under jackets, peeks out of cardigans and sits beneath a slip dress when the weather turns. It’s the hardest-working thing in my wardrobe, and nobody ever notices it, which is exactly the point.
 A patterned base can work too. Just know that it then becomes your focal point, so everything layered over it needs to calm down unless your style is creative or dramatic, then go with layering multiple patterns and textures.
2. The structure
Structure gives the outfit shape and edges. It’s the blazer, the denim jacket, the waistcoat, the longline cardigan with a bit of body, or a collared shirt worn as a collar that gives any outfit a feeling of dressiness (that’s why men wear polo shirts; they are a tee with a collar and look more dressed up yet). This is the piece that tells the world you meant to get dressed, rather than that you fell into the first clean thing you could find.
Pay attention to where each layer ends. A structure piece that finishes at a different point from your base creates a pleasing rhythm, and getting the lengths right is half the battle (I go into this in more detail in more tips on layering).
3. The texture
This is the part most people skip, and it’s why so many outfits look flat even when the colours are lovely. All neutral (and in particular all-black) is the classic culprit: a smooth black top with smooth black trousers can look like a void. Add a ribbed knit, a tweed jacket, a burnout velvet scarf, or a crocheted sweater, and suddenly there’s something for the eye to focus on, creating a more complex and interesting outfit.
Here’s a personal one. My hair is naturally wavy (more kinky than wavy, if I’m honest), and on the days I let it dry naturally, I know my outfit needs texture too. Without it, I just look messy, rather than deliberately relaxed. A spotted textured jacket or a scarf with a wavy fringe picks up the movement in my hair and the whole look suddenly makes sense. Texture is one of my favourite ways to create an interest point without reaching for loud colour or print if that’s not what I’m feeling that day.
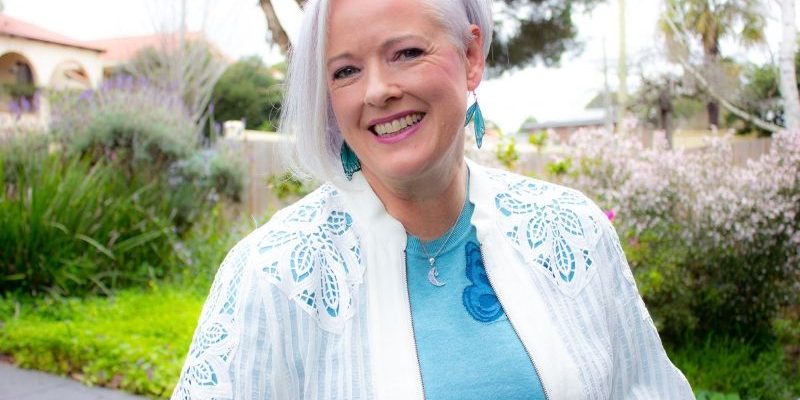
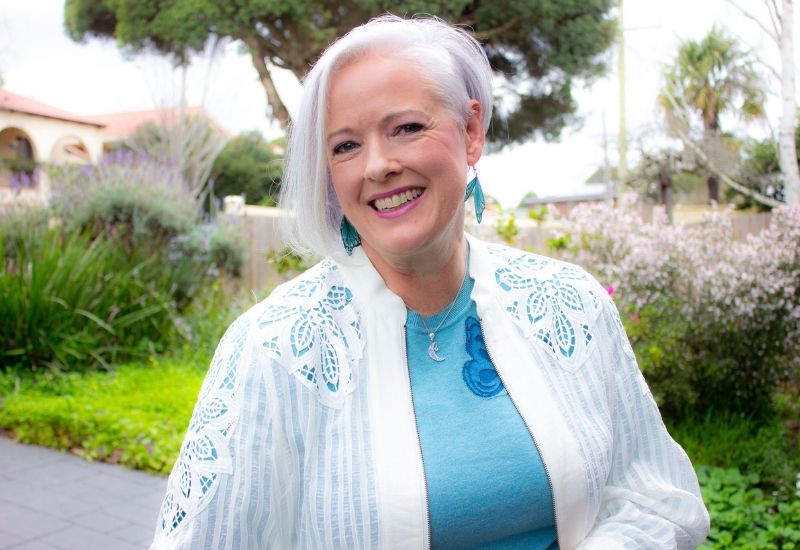
If you have multi-tonal hair – such as highlights and lowlights, or naturally greying hair- texture is another way to create harmony with it. I also love adding a cutout texture over a colour.
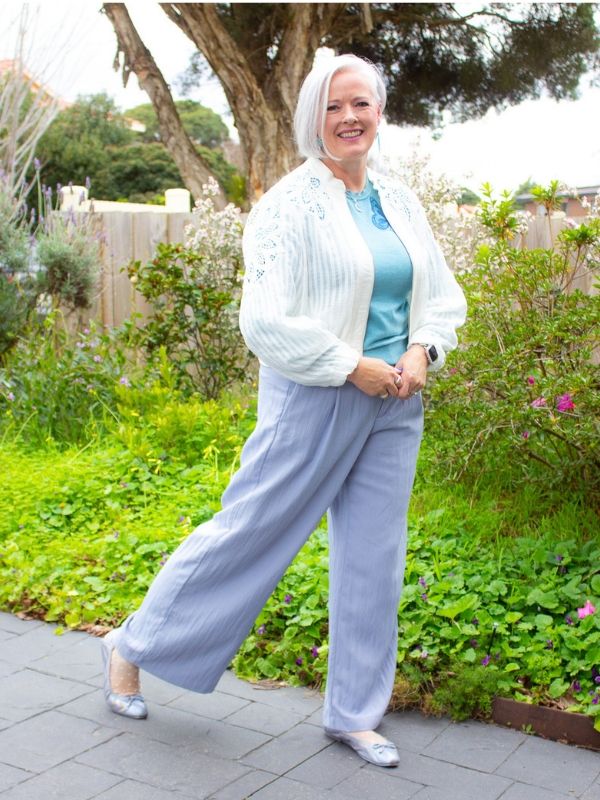 One caution: watch the scale. A texture you’d describe as chunky adds bulk fast. Pair one textured layer with a smoother one and let them contrast. Textures can be fine or chunky; look for more of those fine ones if you feel like you don’t want to add more bulk to your frame.
4. The focal point
The focal point is where the eye lands first, and ideally that’s somewhere near your face. It might be a statement necklace, a scarf, bold earrings, a brooch on a lapel, or a patterned top peeking out from under a plain jacket. As I’ve said before, every stylish outfit needs some kind of detailed focal point, whether it’s built into a garment or added with accessories.
Aim for one main focal point per outfit. If your structure piece is a leopard print jacket, the jacket is the star and your necklace should play backup. If everything is shouting, nothing gets heard.
The focal point is also the quickest swap in the whole formula. Keep the same base, structure and texture; change only the necklace or scarf, and you have a different outfit in under a minute.
How to run the formula on your own wardrobe
Take an hour one evening in the next week, or some time on your weekend. Work through it in order:
- Pull out three or four bases you already wear and like.
- Gather every structured piece that fits you well right now.
- Add your textured layers: knits, scarves, vests, anything with a surface you can feel.
- Layer cutout or lace textures over a coloured base.
- Lay out your focal point accessories where you can see them all at once.
- Build one outfit, then change only one element at a time, and photograph each version. Pop those photos in an album so you can get the inspiration you need when time is limited and your ability to make decisions is low.
The magic is in step five, and it’s my favourite layering hack for style. Changing one element at a time stops you from overthinking, and the photos become your own outfit library for those mornings when your brain simply won’t cooperate.
Light layers for warmer days
Layering isn’t only a cold weather strategy. As the days warm up, the formula still works; you just lighten every ingredient. A linen shirt worn open over a camisole gives you structure without heat. A fine silk scarf gives you texture and a focal point in one. A linen waistcoat over a sleeveless dress adds shape while leaving your arms free. A silk kimono duster over a tank adds interest without heat. The parts stay the same; only the weights change.
Why this beats buying something new
Every time you buy a piece that doesn’t belong with the rest of your wardrobe, it can quietly make everything else look tired. Anthropologist Grant McCracken named this the Diderot effect, after the philosopher whose fancy new dressing gown made the rest of his belongings look shabby, and sent him on a spending spiral to replace them. It’s like when you paint one wall in your house, and suddenly every other wall looks shabby, so you have to paint the whole house.
Layering does the opposite. Instead of one new piece making your old ones look worse, it gives your old pieces new neighbours, and they start to look fresh again. That’s the kind of wardrobe refresh I can get behind.
If you’d love a step-by-step way to build outfits like this every morning, my Outfit Masterclass walks you through exactly how to put pieces together so they look intentional, not accidental.