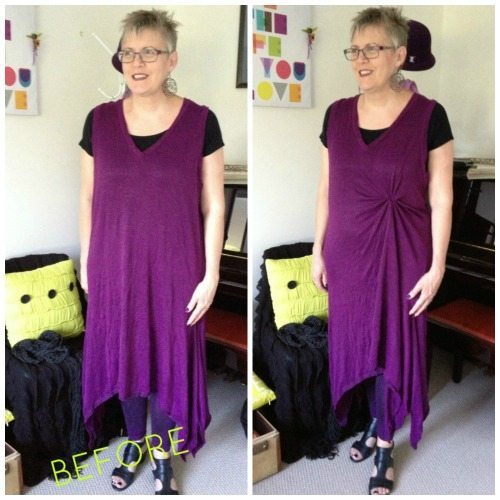
This is the dress that was the inspiration for using a rubber band to restyle tops and dresses to create more shaping, visual interest and a change of hemline. This method saved a number of my clothing items from the recycling bag. Thanks to a colleague this technique has been named the ‘Kimtuck’
After losing some weight my favourite dress looked rather shapeless and unflattering. While playing with the fabric by pulling, twisting and moving it about I had a light bulb moment – ‘What if I tied it on the inside with a rubber band?’
The dress on the right above shows the result of much experimenting. I loved the result and started experimenting on different tops and tunics.
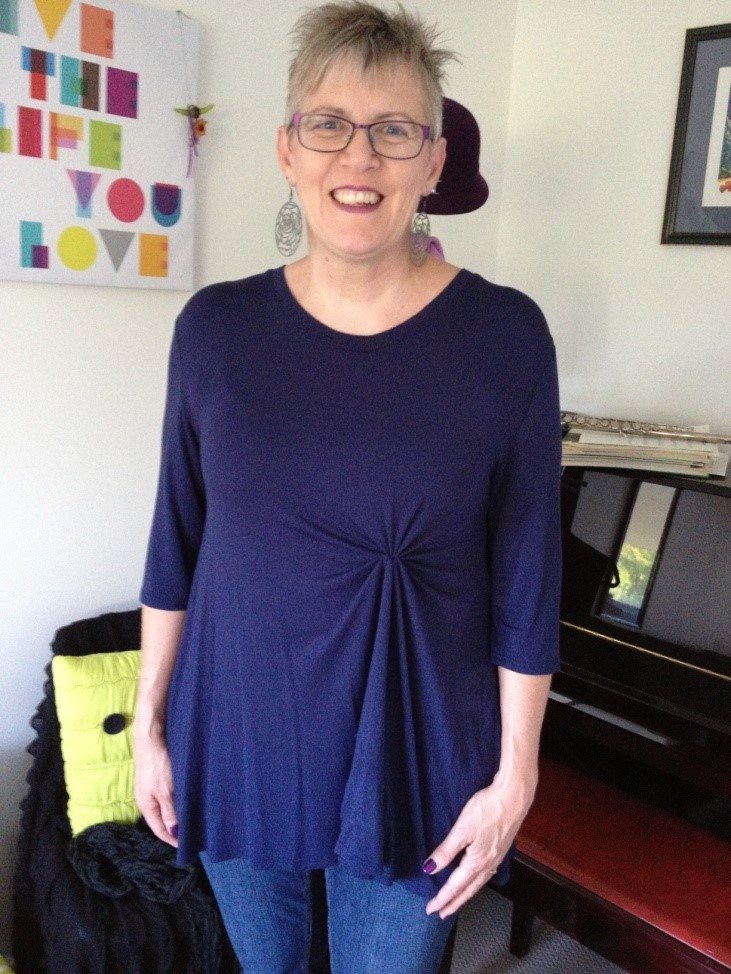
I am an H body shape and do not have a defined waist so my aim was to create the illusion of some definition of shape. My narrowest point is at the top of my ribcage under my bust so that is approximately where I wanted the rubber band to sit. This creates a ruching effect.
Step by Step Rubber Band Restyling
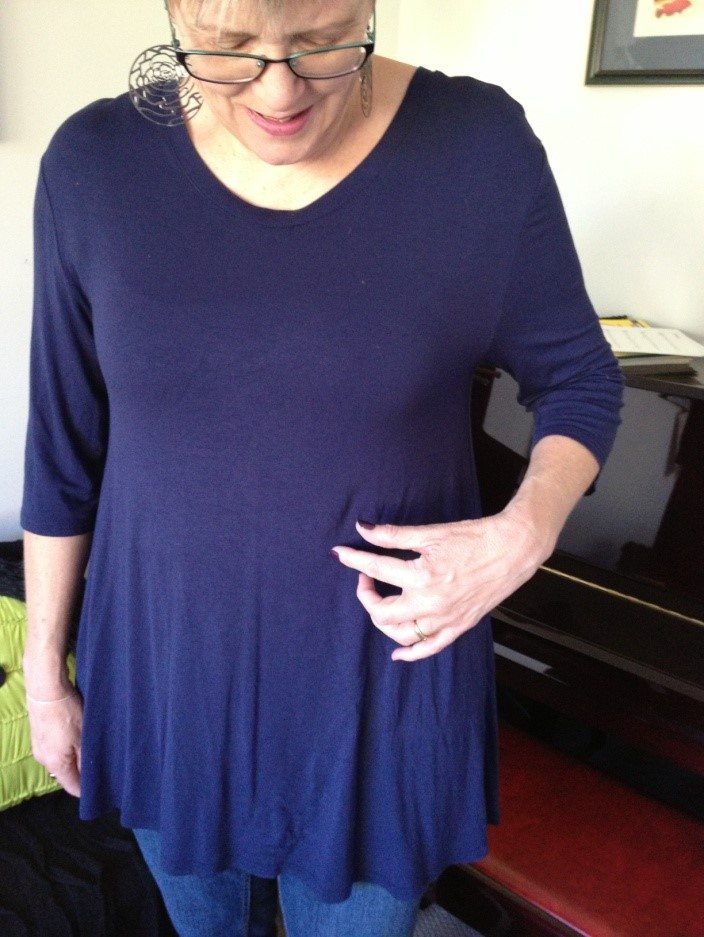
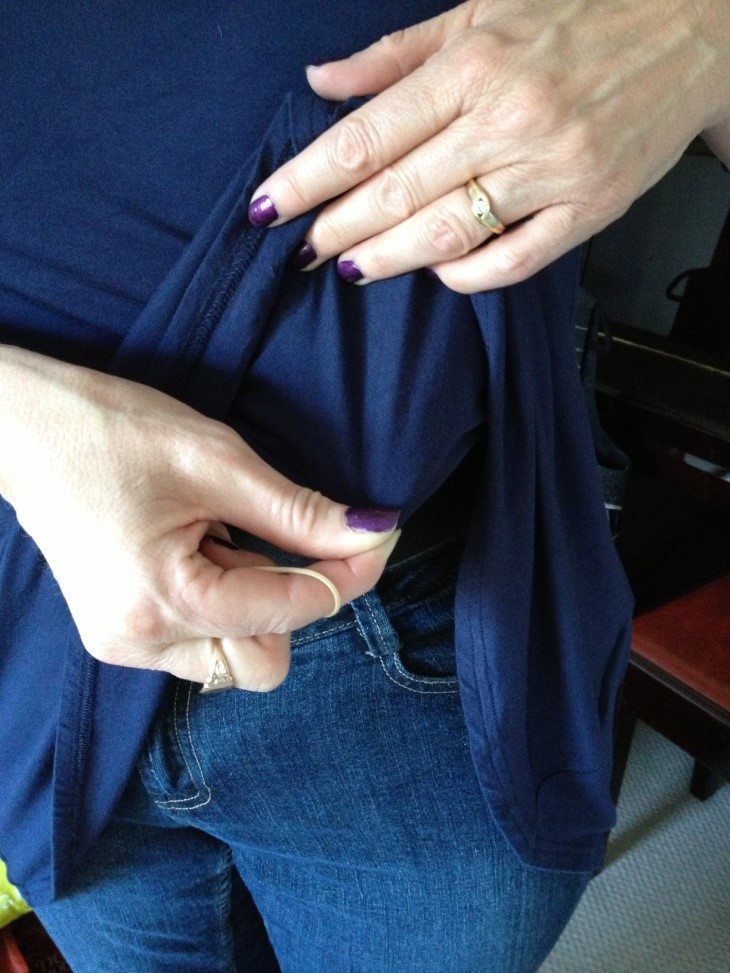
STEP 1
Place a finger where you think tying off might work. This is all about experimenting and redoing.
STEP 2
Keep the finger in position while bringing the bottom of the garment up towards your chest so you can expose the reverse side where your finger is located.
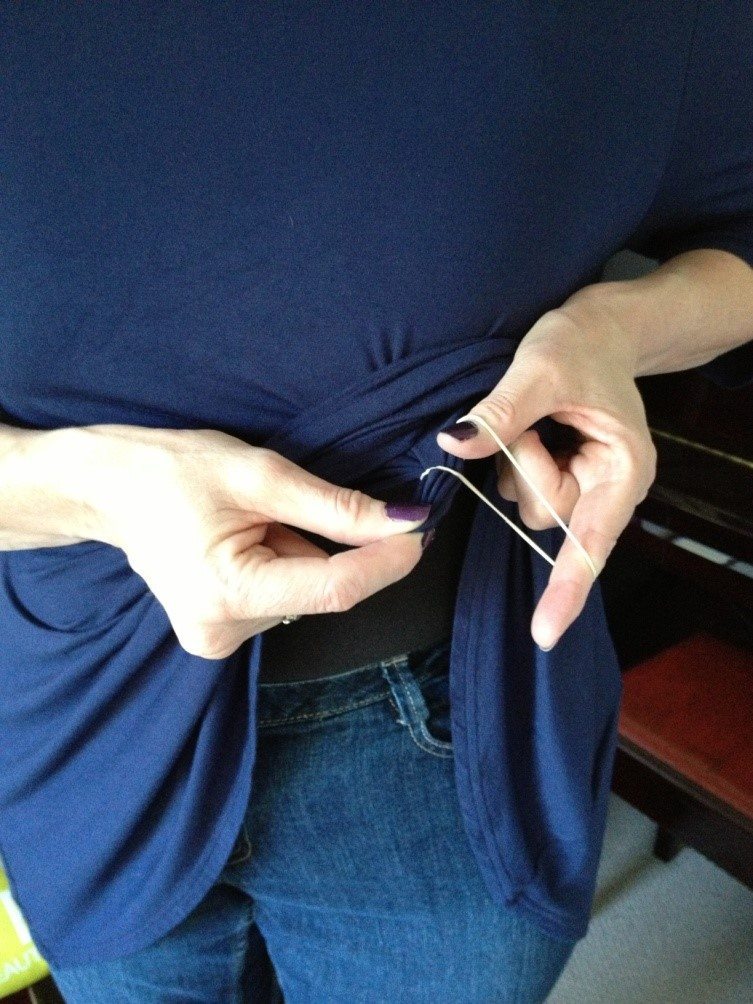
STEP 3
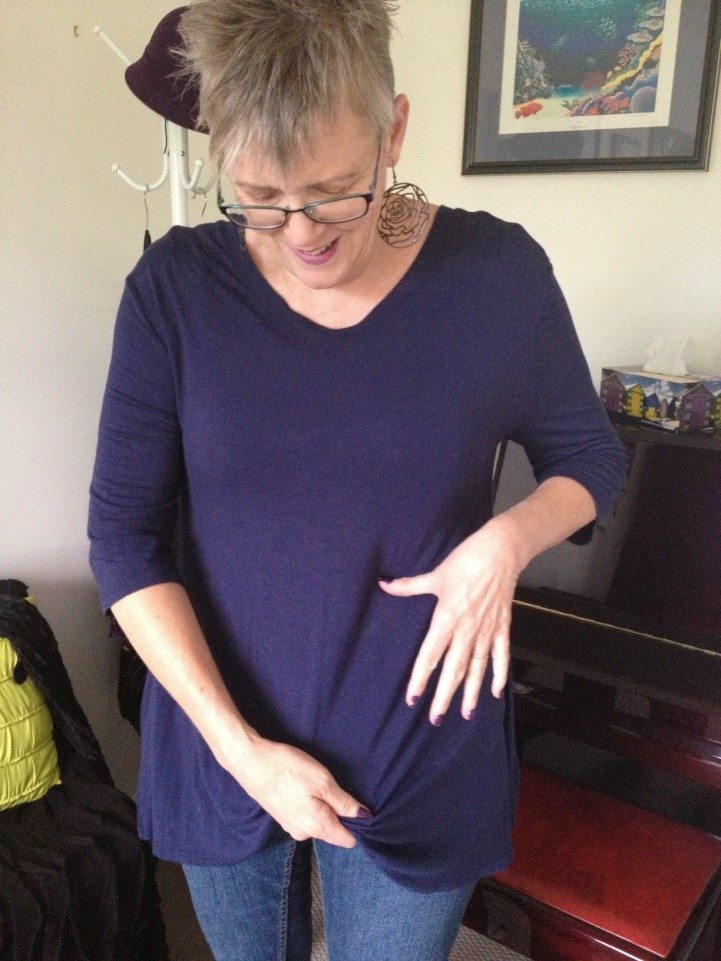
Pinch and pull the piece of fabric where you are going to place the rubber band.
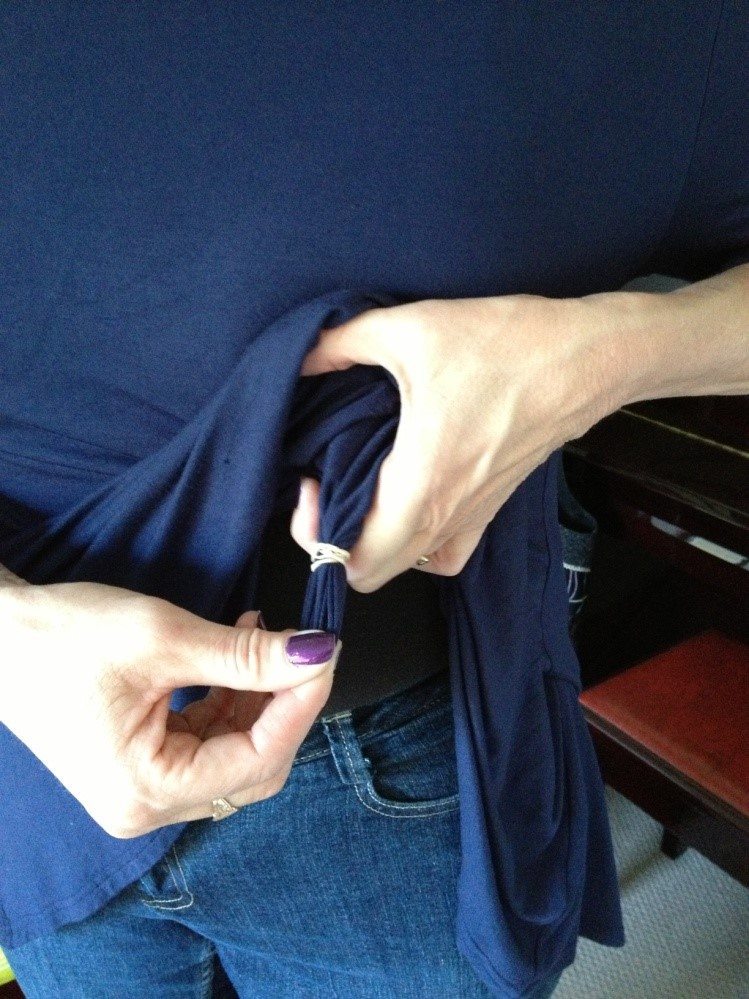
STEP 4
Wind the rubber band around the fabric. Make sure it is tight. I have found that you need to wind the rubber band at a minimum distance of 2 – 3mm from the end. This ensures the band will not come off and result in a wardrobe malfunction.
STEP 5
Check the end result to see if the placement and look is right for you. Repeat the process if necessary. I sometimes need to do this a few time to find the placement that gives the desired look.
STEP 6
Remember to carry spare rubber bands in your purse in case the one you’re wearing breaks.
Some more examples:
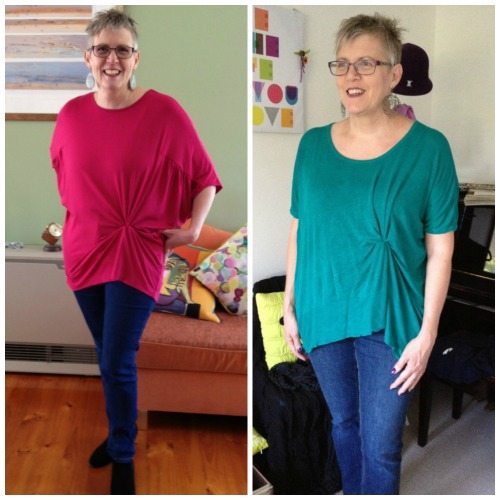
The following images show the effect that different placement points can have on the look.
– Kim Williams







Fun idea! Thanks!
This is such a great idea. I have many dresses which are straight down, shapeless and I need waist definition as I’m an 8. Will be trying this out, the only downside is the fact that it makes the top/dress come up shorter!
Hi Imogen
As always I love the ideas and insights from your blog. I have a question – do you have a Spanish version?
Everywhere I go I find myself mentioning snippets of wisdom gleaned from your site and I love to recommend people to check you out for themselves.
Recently I was on holiday in Mexico making new friends – some bi lingual but with parents with only one language – not English. I would love to direct them to your site but they need Spanish.
As a work around I plan to email daughters with links to good articles so they can practice interpreting from English to Spanish for their mothers but if you already have Spanish versions that would be great! Hence the long question…
Also a chance to say thanks again for your blog and happy new year and congratulations on your marriage.
Thanks Deb
Thanks Imogen, another brilliant idea which I have passed on to my very tiny Mum, who often finds things too long. On a separate matter can you recommend any organisations in the UK who carry out accurate, colour/tonal analysis. I have viewed a number on line but am not sure which would be professional and accurate.
thanks
Anne
I’m not sure Anne as I’m not over there and don’t know people doing colour analysis there. I do a colour analysis as part of my 7 Steps to Style program though if you’re interested. https://insideoutstyleblog.com/7-steps-to-style-system
A stylish friend showed me this same great trick for altering the length on long flowing dresses or skirts when you want to wear flats instead of heels. Just use the rubber band trick on both sides of the dress or skirt but at different heights so it looks more funky.
If you are an H body shape, your hips might be another narrow place that you could gather fabric.
I have an O body shape and when I was 20 pounds thinner I could gather a long t shirt on one side at the hem using a rubber band, but now my stomach is no longer flat enough to do this.
That’s brilliant. So clever.
What a great idea, I will have to remember that trick. Such a simple idea, no sewing required.
Excellent idea. I love it!
It’s so simple! I’ve been searching for shaped tops for a while without much success. I think this could save a lot of my tops!
I have a work blouse that I love but is so unshapely on me. I used this trick on the back of the blouse and it stayed all day today! Thank you!
Excellent – it’s so handy – and cost nothing!
I put a Quarter on the outside of the shirt, then flip to get the inside and use a rubber band to secure the quarter. The coin helps keep the rubber band from slipping.
Great tip Carol! For those outside of the USA a Quarter is a small sized coin!
Using the elasticated pony tail hair bands works a treat too, they dont tend to break like a rubberband.
Thank you for your detailed instructions & pictures! This is exactly the solution I’ve been searching for, bless you!!!